|
I'm in the middle of writing a script for a low-budget film. I'm on page 39 to be exact. But as I'm writing I'm becoming aware of the issues and difficulties around film locations. I realize that not only am I trying to write an engaging story, but I'm also having to be mindful of where I'm placing these scenes. Am I setting a scene in a location that might not be available for shooting? And if I am, do I have an out? Can I change the location of the scene at the last minute and still have the scene play effectively?
I've got one scene where the main character meets with a lawyer. I was going to have it in an office setting, but as I thought about it I realized that an element of character could be shown if the lawyer was out at a picnic table eating lunch. I could show that he's not a high dollar lawyer; that he eats a bag lunch. Maybe he's a little more down to earth. And in the end, shooting at a picnic table in a public park is a whole lot easier than finding an indoor location. So I began to think about other scenes that I've already written and looking at them through this lens. Can a scene that I originally had in a court house lobby be shot outside while the characters are walking up to the courthouse? Can a scene in a mansion be outside the mansion while the character is gardening? Can a scene in a restaurant be outside at a beer garden instead? I know I can't do this with every scene. Viewers might begin to wonder why there are no scenes inside any buildings. And I don't want concerns over locations to take priority as I'm working on the first draft. But I think once I'm done with this draft, I'll go back and see if there are any other places where I could change the scene to a more accessible location without comprising the story.
3 Comments
This may sound a bit crazy, but I'm thinking about making a movie. And not solely a Blender movie, per se, but a live action feature film. I mean, there would be elements in which I'd need to use Blender and maybe After Effects. But this would be a low-budget independent feature film. Really low-budget.
I'm working on a script now and have been really enjoying the process. And as I go I can really picture it in my head. Which of course makes me want to do this even more. And I'm now to the point in my life that this wouldn't be for anything like fame or fortune or getting some fantastic studio deal from Hollywood. I'm past that now. It would be for fun. But can a person do that? Can you really make movies as a hobby? I have all of the camera gear and editing tools I would need. I've got a Masters degree in Film from 30 years ago and I directed two films at that time. One even won a few awards in the US and England. Those were shot on film and required so much help from other people just to load the camera and process the film and conform the negative. But with a good 4k camera and a computer so much of that can be done by one person now. Not that I could do this completely alone. You need people in front of the camera too. And there are so many amazing actors in this area. I wonder if anyone would be interested in this kind of project. Well, there's only one way to find out. I've got to finish the script and see what people think. I'm on page 22 of what I call the Vomit Draft. The first draft in which everything is spit out onto the page without worrying about anything. Just get it out. And once that is done, we'll see if anything comes of it. One step at time. I have this vision of renting a movie theater and screening the film for family and friends and everyone involved with the movie. And then going out for drinks and having a great time. And then get up and start it all again. I may be crazy, but that sounds like a lot of fun to me. Having fun playing around with just creating something without teaching a class or talking into a microphone. I thought I'd work on a vintage car from one of my favorite Wisconsin auto manufacturers, the Kissel Gold Bug. 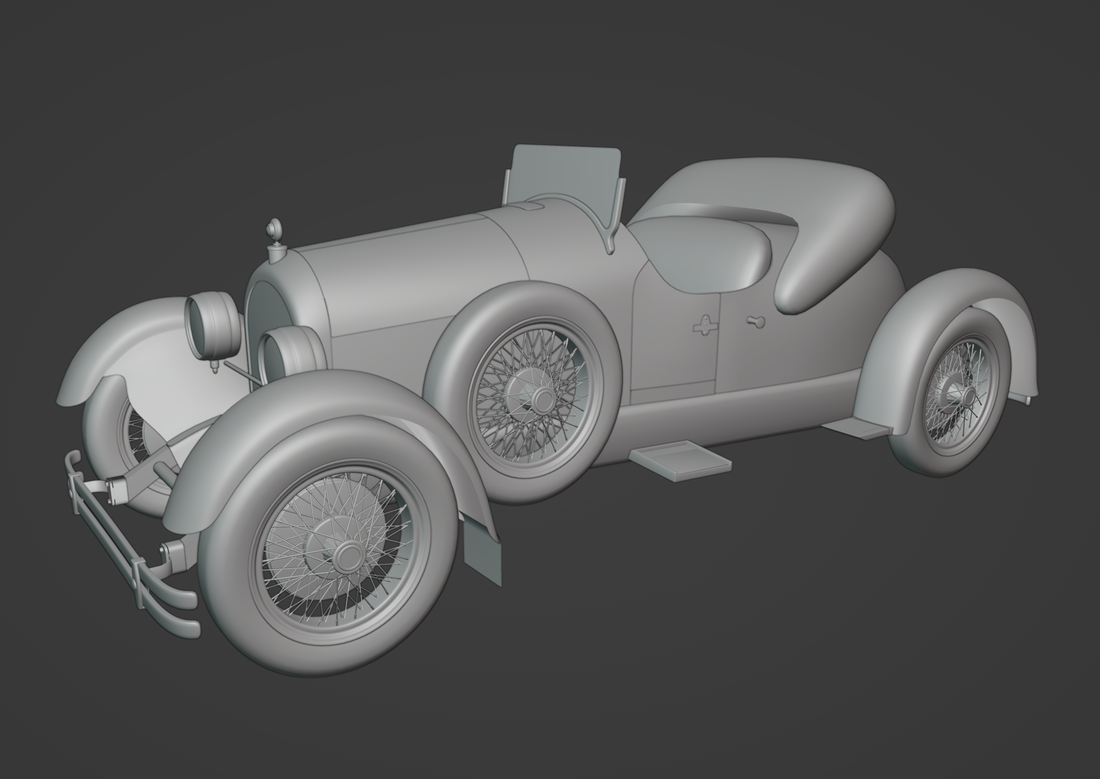 I'm not sure where this will go, but it's been a lot of fun to concentrate on working in Blender. It's been a while since I've just allowed myself to do that. For me at least, it's a great way to relax. :)
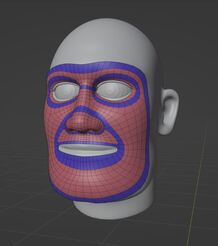
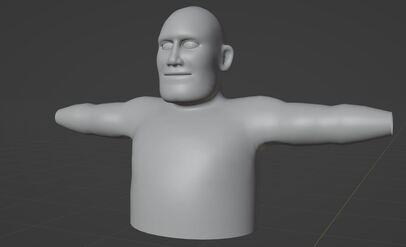
I jumped back into sculpting in Blender to work on one of the characters for the short animation I'm considering. It's been a long time since I've sculpted in Blender and there are new tools and processes that have been introduced since then. So it's taking a little time to get back into the groove of things. But here he is... 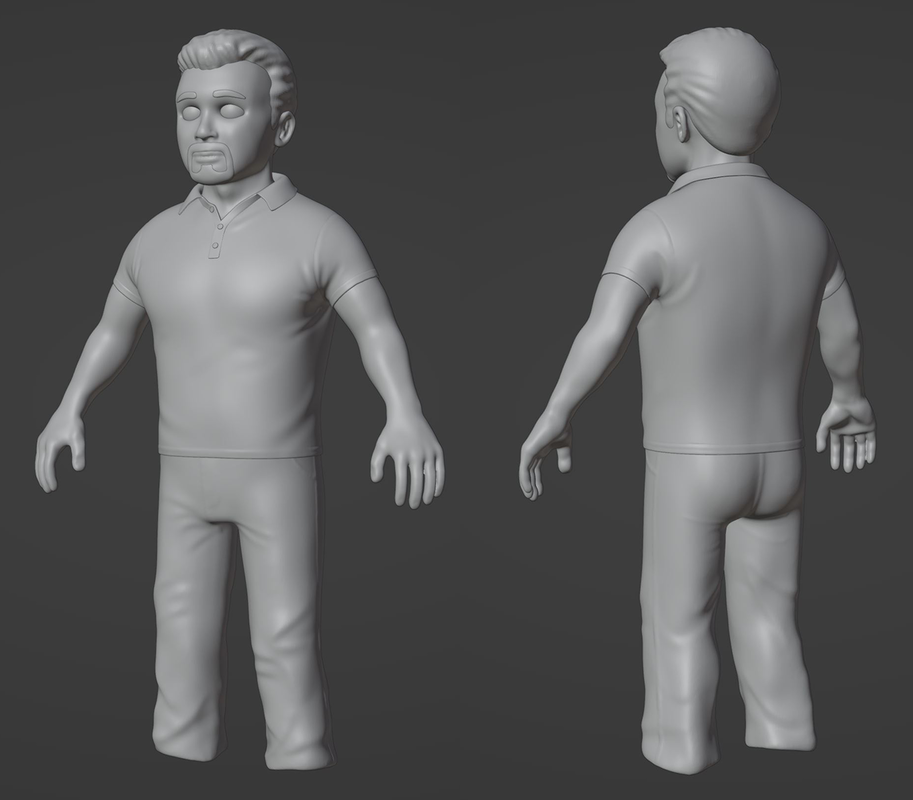 There is still a lot of work to do. Still need to create the shoes and there's a ton of refining that needs to happen. But over all it's a lot of fun to sculpt in Blender now. It's a lot more intuitive than it used to be. Really enjoying the process.
Well, I probably shouldn't do this, but I'm going to put this out to the universe so maybe I can hold myself accountable to actually working on this. Several years ago I had this idea for a short animation that takes place in a convenience store late at night. The working title is "Protection." 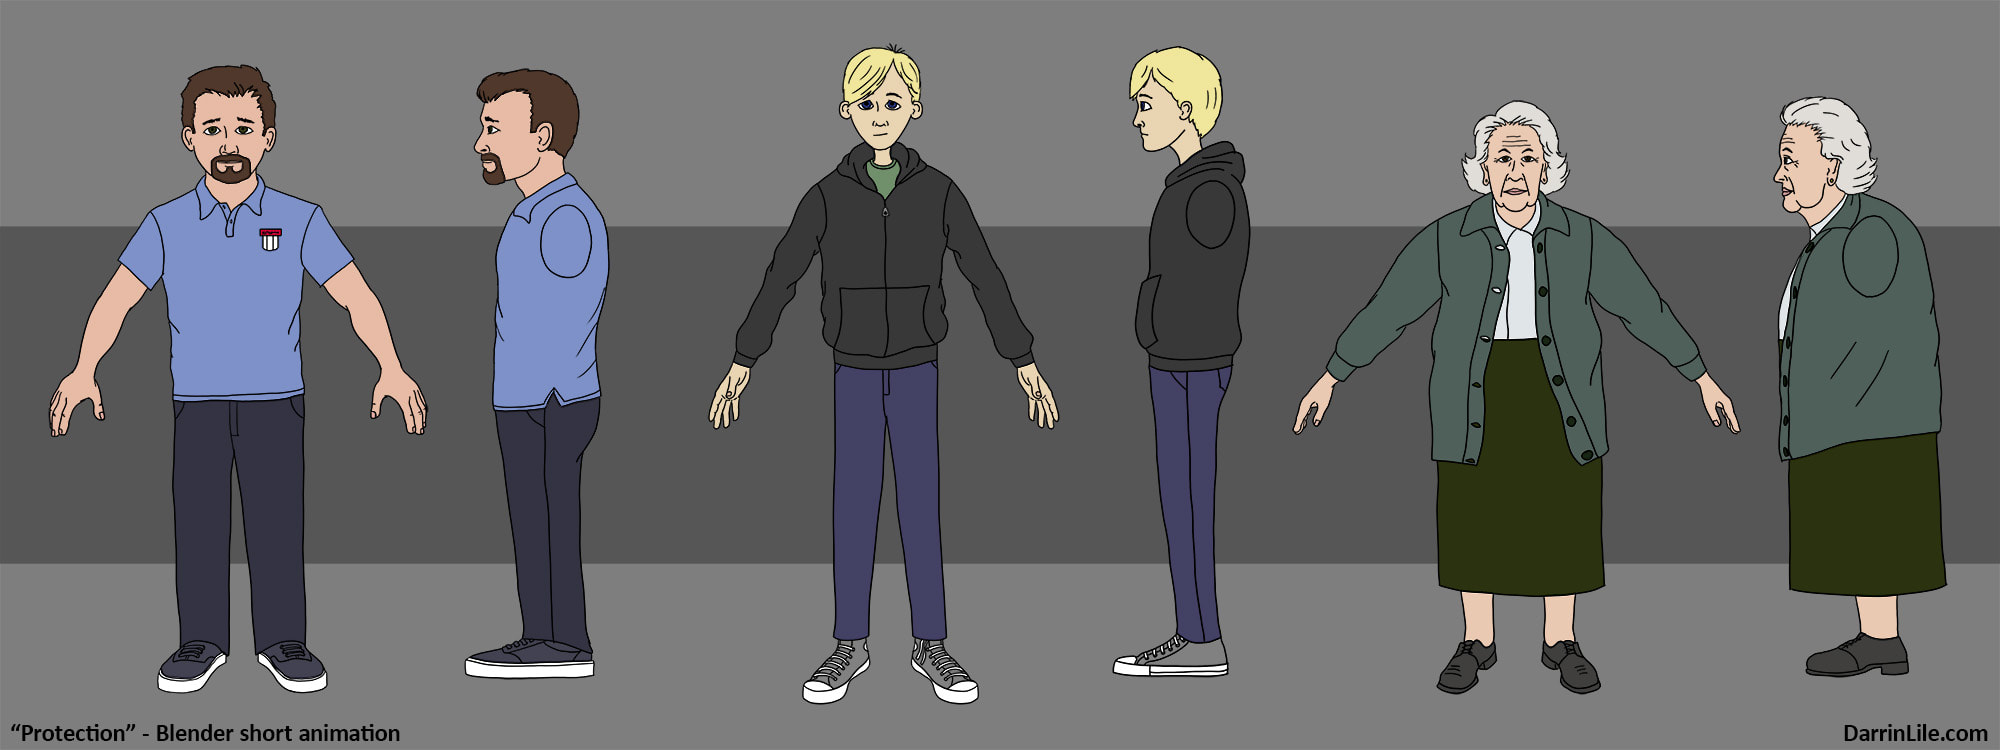 And here are the character designs I've been working on for the past week. It's just three characters, one location, and no dialogue. And I'm thinking that it would end up to be no longer than five minutes. Now I know that five minutes of animation is a huge amount to deal with for one person. But I've got a Perception Neuron motion capture suit, so I'm thinking I could use that. It's an old one from when Perception Neuron had just done a Kickstarter campaign. And I haven't used it in a while. I'm not even sure if it still works. But... if it does, maybe I could use that to get the basic body movements. There would still be a lot of clean-up to do because it's not very smooth in its capture. I don't have a reliable facial capture system, so I would need to animate the faces.
I started working on the interior of the convenience store a long time ago. You can see some of the Youtube videos I streamed while doing that here. I'm not sure I can find those old Blender files anymore. At the time I was planning on finishing the film in Untiy with real-time rendering. But that was back before Eevee, I think, before Cycles got a speed boost, and before I got myself an RTX 3080 graphics card. So I think now I'd just do it all in Blender. I'd probably use Substance Painter for texturing, just because I really like Substance Painter. But do everything else in Blender. What do you think? Is that crazy? Probably. But as I said, I'm posting now so that maybe this will spur me to keep working on it this time. And see where it goes. :) Well, I got a bit distracted while working on my latest course about game character creation. I'm still working on that, but I started thinking about the creation of 3D objects in Blender and the various strategies that people use to make things. And I tried to kind of break down how I approach the creation of a 3D object and what strategies I use, often without even thinking about it. 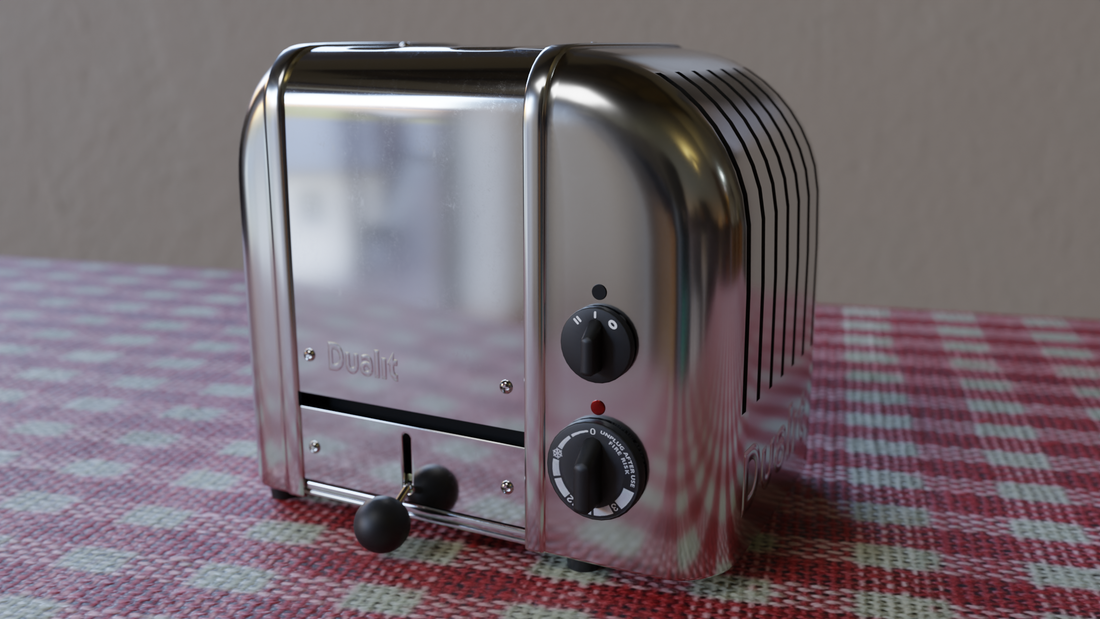 So I began creating something and trying to think more about what I'm actually doing. And so I made a toaster. And I thought that this might be good for others who are just starting out to see. And yep, I started another Blender course. I think this one will be called Blender Strategies for Modeling and Texturing, and it will be a smaller course than most of my others. But I thought it might be useful for a beginning Blender artist to hear a bit of my thought process as I create a fairly complex object like this Dualit toaster. 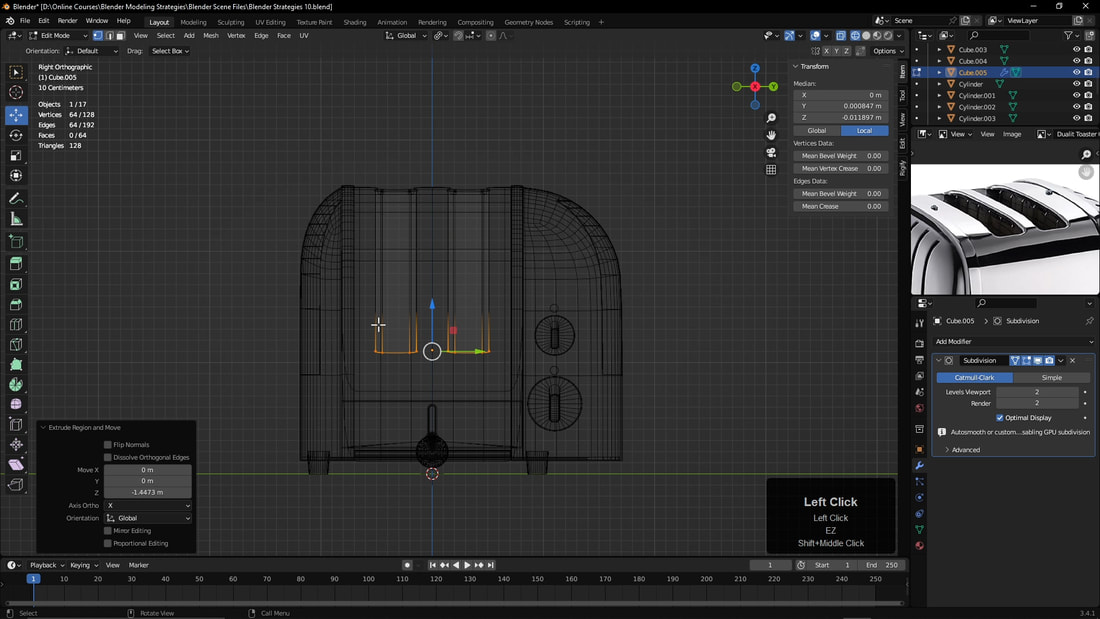 So I hope this course might be helpful for some who are just beginning to branch out into creating more complex objects. It's been fun to go through this process and it has actually been helpful for me to examine some of these strategies and processes. Stay tuned! :)
I've started working on a new Blender course and I feel like it's going to be something a little different. I usually want my courses to be pretty comprehensive and detailed. And because of this they can become fairly big, sometimes with more than 100 videos. I've seen some other video game character courses that are more than 50 hours long. And I feel like there are people who may want to give creating a game character a shot without such a huge commitment up front. 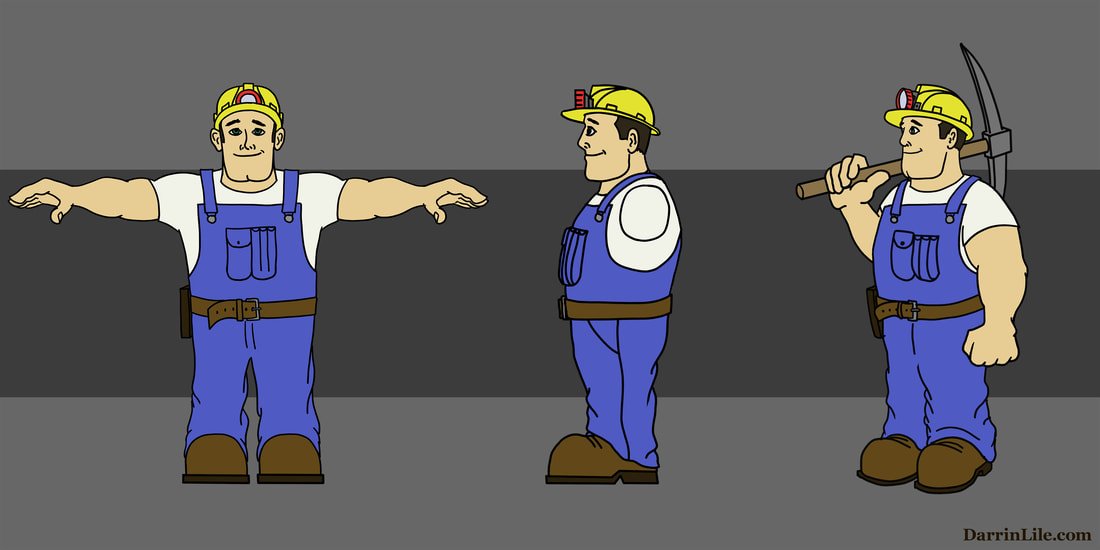 So what I'm doing with this course is trying to introduce the basic concepts and tasks of game character creation, without all the intricate detail of creating a high-end professional game character for a AAA studio. Just the basics. And hopefully someone going through this course will be able to create a character, get it into a game engine, and understand the processes and work that is required for such a project. And then they can decide if they would like to learn more about the topic.
I want it to be an introductory course that can help someone understand if this is something they would like to pursue further. It will cover the fundamentals of sculpting, retopology, edge modeling, UV mapping, texturing and baking, rigging, and setting up the character in Unreal 5. At each step I want to show just enough to get the character to the next stage in the process. We will use free and open-source software. Except for maybe exporting the textures out of Blender. I think we may need to use the SimpleBake add-on for that. At $16 I think that's pretty reasonable. But other than that, everything else will be free to use. So that's my goal. I'm about halfway through the course now, and will hopefully be finished with it in a few weeks. So if you're interested in a introductory overview of the game character process in Blender, then stay tuned! :)
So it looks like beginning in January 2023 I'll be teaching a class at the Milwaukee Institute of Art and Design. I taught 3D animation and game design at The Art Institute of Wisconsin some years ago. But this time I'll be using Blender. I've never been able to do that. At the Art Institute I had to use Autodesk Maya and I never really felt all that much more experienced than the students. Maya is a great program, but it's not Blender.
But now I get to actually teach a class called "3D Modeling and Animation" using Blender! I've had about 18 years of experience using Blender and I've created more than 20 Blender online courses. So I think I finally feel kind of qualified to teach a college level course using Blender. And I'm kind of excited. I know not everyone is as interested or passionate about 3D and Blender as I am, but hopefully I can impart some enthusiasm for the topic. We'll see how it goes. Wish me luck! I released my newest online course today: Blender 3 Motorcycle Creation. This one was a lot of fun for me because I got to delve into the tiny details of creating the parts of a classic 1936 Harley-Davidson motorcycle. I love getting lost in the minutiae of projects like this. But I tried to keep it moving and not get bogged down so that it became boring or repetitive. I know not everyone is quite as nerdy when it comes to Blender modeling. But I do hope I imparted some of the fun in creating detailed models like this. And keep in mind that this is an artistic representation, not an engineering replica. I didn’t attempt to recreate every bolt and wire. That would make for a course that is way too long for even the nerdiest among us. So I hope there is a good balance between learning at a good pace, and geeking out a bit on some of the details.  And it was a lot of fun to use Substance Painter for this course as well. I know that some people are not happy when a Blender course deals with other software that is not open source. But frankly, Blender’s texturing features are just not up to par with industry standards right now. There is so much about Blender that is industry standard that it is disappointing not to have a more intuitive approach to PBR texturing. I think Substance Painter is a great compliment to Blender and allows you to create amazing textures that work wonderfully in Blender. Armor Paint (https://armorpaint.org/) is an open source texture painting program that is coming along very nicely. But it still has a long way to go before it comes close to Substance Painter’s power and ease of use. Don’t count it out, though. I’ll be keeping an eye on it to see how it progresses. 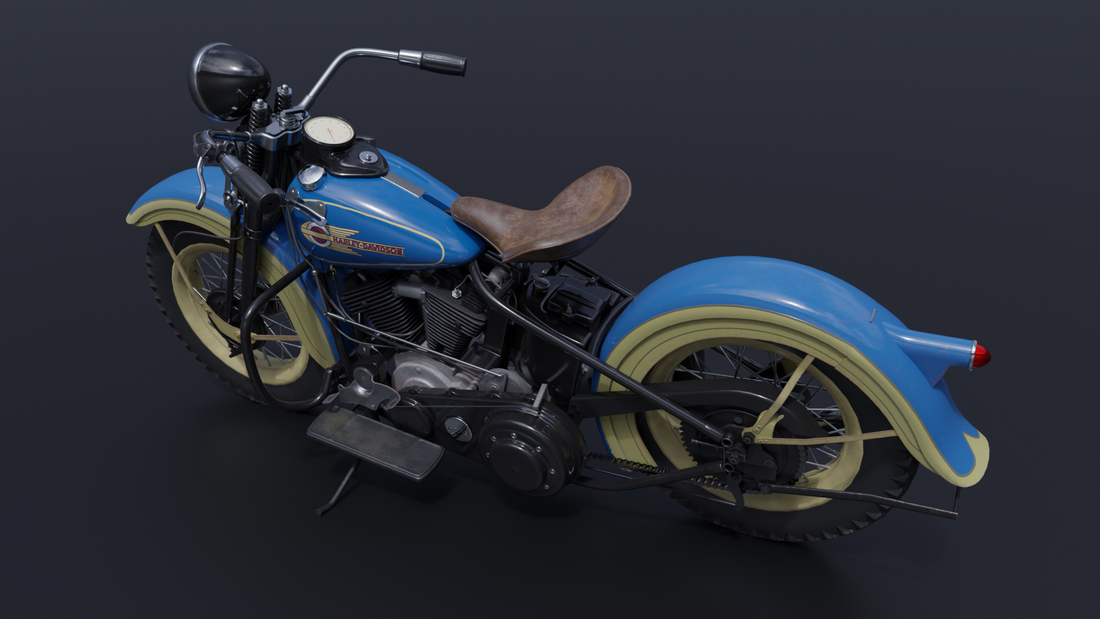 At the end of the course we create a couple of renders using the Cycles renderer, and edit the clips together with Blender’s Video Sequence Editor. I really enjoyed the process of creating this course. And I hope you enjoy it as well. If you take it on, keep me posted on how it goes. I have already received one bit of great feedback. Someone requested more information on how I edited the reference images for the course. So I will add a video with that information coming soon.  I forgot to contact Udemy before the release of the course to have them enable Adaptive Streaming, which allows students to view it at its original 1080 resolution. Someone else reminded me of that and I contacted them immediately. They say it should be ready in about 12 hours. So if you purchase the course and the resolution seems a bit off, just give it a little time. It will be at high resolution soon. 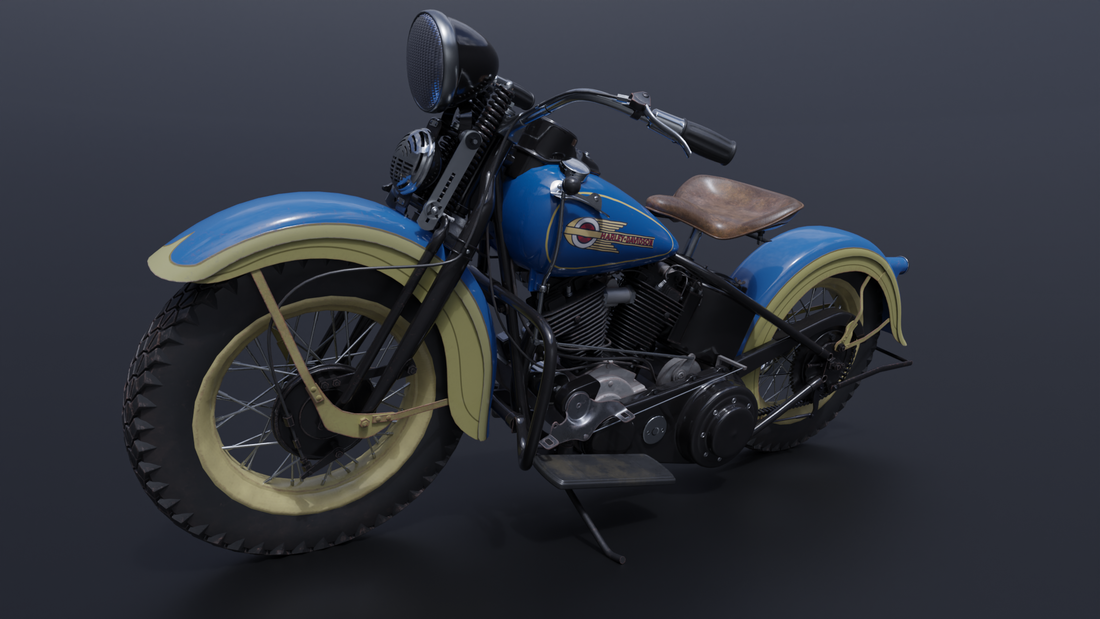 Well, I hope you enjoy the course! Let me know if you have any questions. Now I’m going to start on the next one. A game character. Looking forward to getting that one started. Take care!
In Blender's Outliner we have the ability to create groups, or Collections, to store and organize the objects in our scene. It's pretty intuitive to use, but here are a few tips and tricks that you might not have come across yet.
You already know that you can create new Collections by right-clicking in the Outliner. And you move items by dragging and dropping them where you want. But you can also press the M key to bring up the "Move to Collection" menu. Here you can create a new Collection, while at the same time moving any selected items to that Collection, all at once. In addition, if you hover over the Outliner with your cursor, you can press the Plus or Minus keys on the NumPad to expand or collapse all of the Collections. And to isolate one Collection, while hiding the rest, you can press the Ctrl key and Left Mouse Click the Collection. Ctrl-clicking the Collection again unhides all of the others. And here's a tip regarding Materials and the Outliner. If you've ever tried to get rid of a Material in Blender, you know that it's kind of a pain. You usually have to first ensure that no objects are using the material, and then close the Blender file and reopen it. An easier way is to go to the Display Mode menu at the top of the Outliner and change to Blender File. Here you can go to the Materials section, select a Material, and just press Delete. So there are a few tips and tricks regarding Blender's Outliner and Collections. Hope that helps. All the best! Darrin Lile |
AuthorDarrin Lile is a 3D Artist, Blender Instructor, and all-around tech and science nerd. He can be bribed with Peanut M&Ms. Archives
June 2024
Categories |
 RSS Feed